
Why Is Setting Up WordPress Backup The Most Important Thing You’ll Do Today?
As Bloggers, we spend a lot of time building our website. We put so much effort into creating content, building an online readership and an engaged audience. For most online entrepreneurs the home website is the top money-maker in their business – working for them 24×7.
Would you drive a car with no insurance? Of course not! So why are you neglecting your website backups?
Imagine this scenario: following brilliant advice from Chris Ducker, you decide to outsource some work on your website. Yay for you – it’s a great idea! So you get someone from Elance.com with decent reviews, go to bed – ready to wake up to a new world of geo-arbitrage and outsourcing bliss.
But when you wake up the next morning, you find out that your brilliant hired expert broke your website, lost your previous design, and mistakenly deleted over a month’s worth of content that you worked so hard to create. This is exactly what happened to my friend, Natalie Sisson just last week.
Not a fan of outsourcing? Fine, what would you do if someone hacked into your website? Or if you deleted something by mistake? Or your web host is under a cyber attach?
It really doesn’t matter what the circumstances are. At some stage, every web owner finds himself asking this frightening question:
“Do I have a backup?”
Having an updated and relevant backup is your insurance policy for a rainy online day. Having one means that no matter what happens, you can be back in business within minutes. Deleted something? You can restore. Someone broke something? No worries! Your hosting provider is under a massive cyber attack? You can restore to a different server and be back in minutes.

The thing that amazes me is how easy it is to set a bulletproof, easy, and (the best part) – fully automatic backup process. Invest 15 minutes of your time today, and you will save a multitude of it when you’ll need it.
So today I want to show you how to create a WordPress backup process that will run automatically for you, and save the backup files to somewhere that’s EASY to access when shit hits the fan. Sounds good?
How Often Should You Backup WordPress Blogs?
There’s much debate on this, and I have two answers:
- Probably much more often than you’re currently doing your backups.
- As often as possible
It’s pretty straight forward: you always want to have all your latest changes, blog comments, subscribers, and uploaded files fully backed up. Assuming we will have all the process automated by the end of this post, there’s only one problem: Fully backing up everything on your WordPress site will take a big amount of space. More on that in a bit.
The second consideration is how many old backups you want to keep. Think about it – if your site is backed up daily, but it takes you more than a day to notice something broke or was deleted – your latest backup won’t do. You’ll need to go back to a backup from the day before in order to restore what was lost. Hence, you’ll want to keep a backup history, and not just the latest file. (The good news? It’s easy!)
How much will it cost (in time & money)?
In terms of time, implementing this guide should take you less than 15 minutes. As to money – setting up an automatic backup process for your WordPress site will cost you a hefty… $0. (Yup, it’s 100% free!)
Best WordPress Plugins For WordPress Backup
WordPress has several popular (and free) backup plugins, including:
- BackWPup
- WordPress Duplicator
- BackUpWordPress
- Simple Backup
- EZ Backup
- And many others
I’ve had my experience with a good amount of those listed and with plenty of other plugins. I can safely say, beyond doubt, that BackWPup is by far the most robust, easy to set up, easy to restore from, and easy to use of the lot. I never lost a single piece of data with it, which I can’t say about premium plugins like Backup Buddy and others, who failed me and my clients on different occasions.
Our WordPress Backup Plan
The plan is simple: Set a process that will automatically create dependable backup files and place them in a safe location that’s easily accessible at need. What location would that be? I believe the perfect place is somewhere within a click’s reach: Your Dropbox folder. (We’ll also keep another copy of each Backup file on your server, just in case!).
Back to the issue of file sizes that I mentioned earlier in this post. Having a bulletproof backup plan that doesn’t take gigabytes over gigabytes is a matter of balance, we’ll achieve this balance by having two types of backups scheduled for our website:
WordPress Database Backup
This is a working copy of your WordPress database. It includes:
- The content (text & styling) of all of your posts and pages.
- All comments made on your blog.
- Your WordPress users & passwords.
- Your WordPress settings.
- Your plugin settings.
- Your theme settings.
It does not include:
- Your media uploads (photos, videos, PDFs, etc.)
- Your plugins files.
- Your theme files.
A typical size for the WordPress database backup would be 1-10MB. We will set the database backup to run as a daily task – since the file size is small and it contains the information that’s most important to us – content, comments and settings.
WordPress Directory Backup
The WordPress directory backup covers all the files inside your WordPress installation folder – including theme files, graphics, media, plugin files, etc. We will set the directory backup to take place on a weekly basis. This will allow you to restore anything: from a single missing file, to a complete website restore – in a matter of minutes.
The typical file size for such backup varies greatly (depending on your website), but is usually between 50MB and up to 1.5GB – which is why I recommend this to be done weekly and not daily!
Step By Step WordPress Tutorial For Setting Up a Bulletproof WordPress Blog Backup
There are two ways to follow this setup:
- With the step-by-step screencast video I created for you.
- By following the steps in text below.
I believe it’s easier to learn with video, but it’s up to you.
Here’s the step-by-step video showing the entire setup and configuration process. Follow it and you’ll be done in 10 minutes:
Not a fan of video? OK 🙂 I’ve got you covered! Here goes:
Installing A WordPress Backup Plugin (BackWPup)
As I mentioned, we will be using the BackWPup free plugin for this setup, since it’s the most reliable one out of all free options that I’ve used. Here’s how you install it:
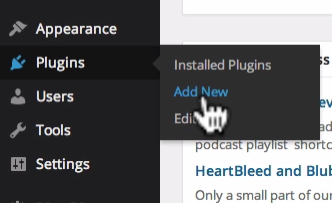
Step 1: Open your website’s WordPress admin panel. On the left-side menu, hover over ‘Plugins’ and select ‘Add New’
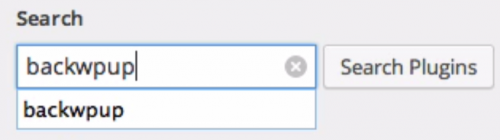
Step 2: In the search box that appears, type ‘BackWPup’ and click on ‘Search Plugins’.
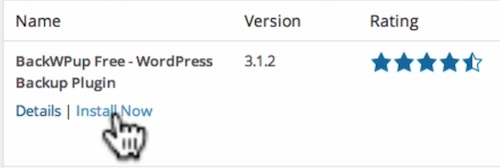
Step 3: Locate the plugin titled ‘BackWPup Free – WordPress Backup Plugin’ and click ‘Install Now’.
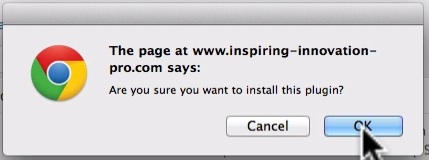
In the dialog window that will open, confirm the installation.
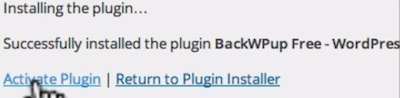
Step 4: Once the installation complete, click on ‘Activate Plugin’.
And you’ll be redirected to the “Welcome to BackWPup” screen:
Congrats! You’ve just installed BackWPup plugin successfully : ) Now let’s configure the automatic backup!
Setting Up WordPress Database Backup
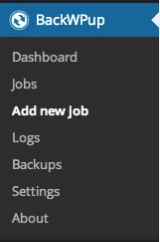
Step 1: On the left-side menu, under ‘BackWPup’, select ‘Add new job’.
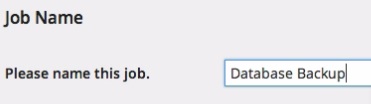
Step 2: In the new screen that loads, in ‘Job Name’, put: Database Backup.
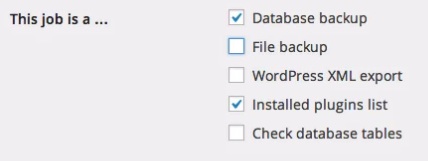
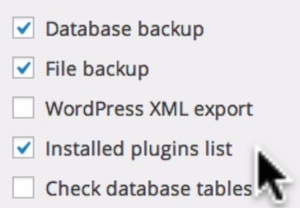
Step 3: Under ‘Job Tasks’ make the following selections:
- Database backup: Checked
- File backup: Unchecked
- WordPress XML export: Unchecked
- Installed plugins list: Checked
- Check database tables: Unchecked
Step 4: Under ‘Archive Name’ you will find a name in this format: backwpup_[random letters]_%Y-%m-%d_%H-%i-%s.

The ‘%Y-%m-%d_%H-%i-%s’ will add the current date and time to the backup file name – which will make it a lot easier to find and identify later – so we’ll keep that part in.
The random letters (in the above example those are ‘2775e7’) are an important security measure. They make it very hard for an outsider to guess the your backup’s file names – which makes it a lot harder to steal them. So that’s pretty important!
To make thinks readable though, I recommend that instead of ‘backwpup_[random letters]’, you’ll use the following format: ‘[your-domain]_database_backup_[random letters]_[date stuff]’, so you’ll know which website the backup file belongs to.
For instance, if I’m backing up inspiring-innovation-pro.com, I’d use: inspiring-innovation-pro.com_database_backup_2775e7_%Y-%m-%d_%H-%i-%s as my ‘Archive Name’.
(Notice: you should use your own set of random letters)

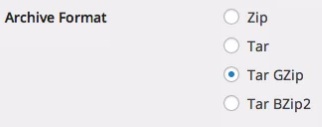
Step 5: ‘Archive Format’ – I recommend leaving as ‘Tar GZIP’
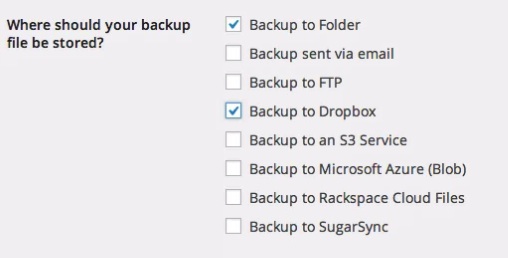
Step 6: In the ‘Job Destination’ section, select:
- ‘Backup to Folder’ Checked
- ‘Backup to Dropbox’ Checked
This will create two copies of each backup; one kept on your server, and one kept in your Dropbox folder.
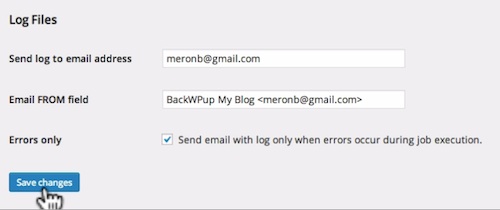
Step 7: Under ‘Log Files’, fill in your email address. It will be used in case of errors in the backup process. These are errors that YOU WANT TO know about, so use your primary email here! Then click ‘Save Changes’.
Step 8: Click on the ‘To: Folder’ tab at the top of the screen.

Step 9: In the ‘Folder to store backups in’ field, the end of the text there will typically be formatted like this: ‘…uploads/backwpup-[random letters]-backups/’.
![]()
I suggest changing it to ‘…uploads/database-backups-[random letters]/’ (make sure you keep the backslash at the end of this field).
![]()
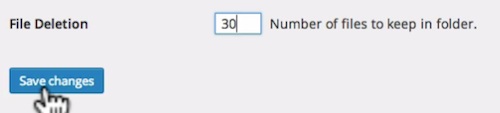
Step 10: Set ‘File Deletion’ to reflect how many old backups you would like to keep. I like keeping 365 daily database backups on my server – just in case (database backup should be relatively small files any way). Set to what works for you, and then click ‘Save Changes’.

Step 11: Once the page reloads, click on the ‘To: Dropbox’ tab at the top of the screen.
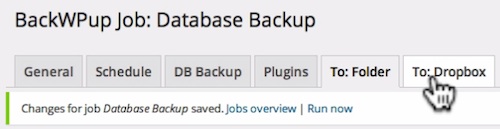
Step 12: Click on the ‘Reauthenticate (full Dropbox)’ button.
[Update June 11, 2014]: If you’re getting a “Dropbox API: (59) Unknown cipher in list” error during this stage, you need to install another plugin on your website before continuing. Follow instructions here and then return and carry on from here.

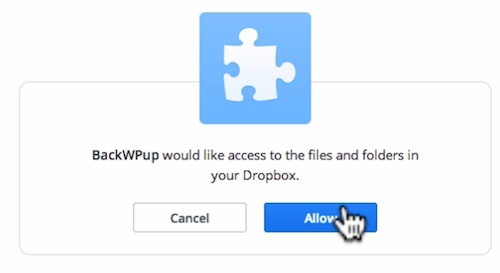
It will take you to Dropbox where you will log in to Dropbox if you’re not logged in yet. Then you’ll be requested to approve BackWPup’s access to your Dropbox files. Approve it by clicking ‘Allow’.
Step 13: You’ll be redirected back to the BackWPup settings panel. Under ‘Folder in Dropbox’, I recommend filling in: Backups/[your-domain-name]/database-backups/. This will keep your Dropbox folder organized and will make it very easy to locate backups, no matter how many websites you run! (Note: if you’re running out of Dropbox space, see the bottom of this post for more options).

Step 14: Set ‘File Deletion’ to reflect how many old backups you would like to maintain in Dropbox. I usually set this to 30, so I have an entire month worth of backup within easy reach on my Dropbox account. Then, click on ‘Save Changes’.
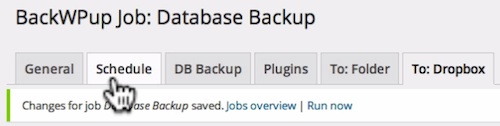
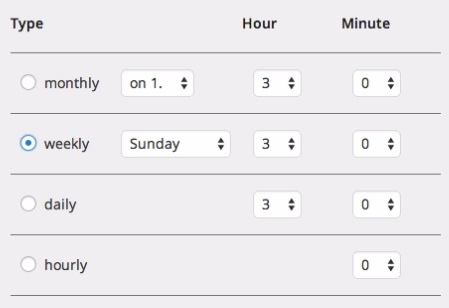
Step 15: Once the page reloads, click on the ‘Schedule’ tab at the top of the screen.
Step 16: Under ‘Start Job’, select ‘with WordPress cron’.

Step 17: Under ‘Scheduler’, select ‘Daily’ and pick an hour of the day were you don’t have too much traffic going on (like 3am). Next, click ‘Save Changes’

Step 18: Click on ‘Run Now’ to make sure the backup works.

And now, watch it run flawlessly! : )
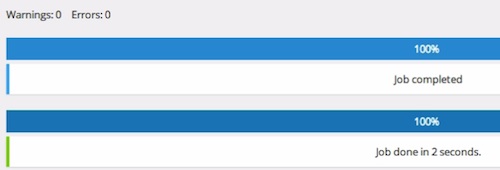
Congrats! You have an automatic WordPress database backup that will run every day and create a backup file both on your server, and in your Dropbox!
Now let’s set the WordPress directory backup and call it a day!
Setting Up WordPress Directory Backup
Here’s how you configure the weekly directory backup, that together with the daily database backup will complete our bulletproof backup solution!
Step 1: On the left-side menu, under ‘BackWPup’, select ‘Add new job’.
Step 2: In the new screen that loads, in ‘Job Name’, put: WordPress Directory (Full Backup).

Step 3: Under ‘Job Tasks’ make the following selections:
- Database backup: Checked
- File backup: Checked
- WordPress XML export: Unchecked
- Installed plugins list: Checked
- Check database tables: Unchecked
Step 4: Under ‘Archive Name’, like we did on the WordPress database backup job, I recommend using ‘[your-domain]_directory_backup_[random letters]_%Y-%m-%d_%H-%i-%s’.
Step 5: ‘Archive Format’ – I recommend leaving as ‘Tar GZIP’
Step 6: In the ‘Job Destination’ section, select:
- ‘Backup to Folder’ Checked
- ‘Backup to Dropbox’ Checked
This will create two copies of each backup; one kept on your server, and one kept in your Dropbox folder.
Step 7: Under ‘Log Files’, fill in your email address. It will be used in case of errors in the backup process. These are errors that YOU WANT TO know about, so use your primary email here! Then click ‘Save Changes’.
Step 8: Click on the ‘To: Folder’ tab at the top of the screen.
Step 9: In the ‘Folder to store backups in’ field, go to the end of the text box, and change the last part of the name to ‘…uploads/directory-backups-[random-letters]/’ (make sure you keep the backslash at the end of this field).
Step 10: Set ‘File Deletion’ to 15 (not too little and not too much!) and click ‘Save Changes’
Step 11: Once the page reloads, click on the ‘To: Dropbox’ tab at the top of the screen.
Step 12: Click on the ‘Reauthenticate (full Dropbox)’ button.
[Update June 11, 2014]: If you’re getting a “Dropbox API: (59) Unknown cipher in list” error during this stage, you need to install another plugin on your website before continuing. Follow instructions here and then return and carry on from here.
It will take you to Dropbox where you will log in to Dropbox if you’re not logged in yet. Then you’ll be requested to approve BackWPup’s access to your Dropbox files. Approve it by clicking ‘Allow’.
Step 13: Under ‘Folder in Dropbox’, I recommend filling in: Backups/[your-domain]/directory-backups/.
Step 14: Set ‘File Deletion’ to reflect how many old backups you would like to maintain in Dropbox. I usually set this to 4, so I have an entire month worth of weekly backups within easy reach on my Dropbox account. Then click ‘Save Changes’.
Step 15: Once the page reloads, click on the ‘Schedule’ tab at the top of the screen.
Step 16: Under ‘Start Job’, select ‘with WordPress cron’.
Step 17: Under ‘Scheduler’, select ‘Weekly’ and pick a day and hour where you don’t have too much traffic going on. Next, click ‘Save Changes’
Step 18: Click on ‘Run Now’ to make sure the backup works!
Congrats! You have your automatic WordPress backup all set and you are now fully covered! Well done!
FAQ & Common Problems:
Q: What if i don’t have enough space on my Dropbox?
A: You can sign up for an Amazon S3 account and keep an unlimited amount of backups there! Here’s a breakdown of Amazon S3 costs:
- Setup: Free.
- Free Usage Tier: 5,000 MB standard storage for free every month for your first 12 months using S3.
- After the Free Usage period, you pay $0.0300 per GB you backup, for up to 1,000GB. Bottom line: Let’s say your database backup is 20MB, and your directory backup is 500MB. For daily database backups and weekly directory backups you’ll pay a whopping $0.078 dollars per month. Yes, 7 cents!!!
Getting started with Amazon S3 and setting up safe file permissions for BackWPup is a bit out of this post’s scope, but I have an e-book & step-by-step video about it that you can grab here: Setting Up Bulletproof WordPress Backups with Amazon S3.
Q: I have a membership site and I want to back up my users and transactions. Should I change anything?
A: Yes. I’d make the database backups run hourly instead of daily. This will obviously take much more space on your Dropbox folder, so if you need more space, check out the question above!
Final Words
Thank you for checking out this guide. I hope it will help you set up secure and reliable WordPress backups so you never find yourself caught with your pants down!
Over to you: How Do You Backup Your WordPress Site?
Do you backup your site? What tools do YOU use? Any specific plugin or system working well for you? Share with us in the comments below!
P.S. If you found this post useful, would you consider clicking on the social share buttons (Facebook, Twitter, Google+) below to let others know about it? 🙂 Thanks!
Photo credits: Scared businessman, © afxhome – Fotolia.com. Drowning man’s arm: © Elenathewise – Fotolia.com
Wow this is a crazy great post on backups and I’ll be following this through to the T since BackupBuddy wasn’t as reliable for me as I thought either. Great stuff Meron and a super useful resource for everyone who’ll face this challenge at some point – cos it happens to everyone!
Thanks for your help with my site too
My pleasure 🙂 I’m just sorry this post was written AFTER your site suffered, but we’ll definitely have you covered for the future.
Isn’t is funny that in all the “VA & Outsourcing” talk in our niche, backups get forgotten? I know it’s not a sexy subject – but it truly is one of the most important systems to set up! I hope people will take a cue from your latest email – and secure their site to avoid those rainy days…
Hey Meron! Very thorough post.
I use BackupBuddy (curious where it failed for Natalie).
I back up my site to the server, Dropbox, and iThemes server. My Dropbox folder is backed up with Carbonite.
Since I have a two site license though, I may have to follow this tutorial for my other sites that are not backed up fully (just the content and images on my computer).
I am nervous about putting the backup of my main sites in the hands of free plugins. If future updates of WP break them and the author doesn’t update, you could get screwed.
Same could happen with paid plugins, but feel the response to fix will be quicker since this is a revenue stream for the company.
Hey Jason! Thanks 🙂
Without getting into too much details – I would say that not having the backups run often enough, and not having them copy to a remote location that cannot be deleted by mistake, was the main issue – that is to say – (most of) the files were not corrupted or faulty due to the plugin itself.
I love how you’re as pedantic as I am (I have Crashplan backing Dropbox up – – but same concept!). I hear what you’re saying about free VS paid, but don’t forget that they have some premium version too, AFAIK. As an OptimizePress user, which ain’t a cheap plugin, I had to suffer through quite a few issues after updates, even though it’s paid. So I guess it goes back to looking at the track record of each plugin and choosing the best thing for you.
I chose to focus on a free plugin because I think it’s great (as I wrote – it never failed me, touch wood!), and this way there’s absolutely no excuses for anyone not to set this up right now. Heck, one can set BackWPup and Backup Buddy on the same site if they’re really paranoid 😉 Most people have nothing set, and following this post I really hope they will.
Here’s to never needing those backups, huh? 🙂
Thank you so much! This was great!
Is it okay if I translate your tutorial into swedish? Want to share with my swedish customers. (I will refer to you)
Ann, it would be my pleasure! Thanks for spreading the word!
My brother suggested I may like this website. He used to be totally right.
This put up actually made my day. You can not imagine simply how so much time
I had spent for tbis information! Thanks!
Woohoo! Glad it helped! 🙂